Category Archives: Fun At Home

Creativity in a box.

Tis the season!
It’s time to grab one or two of our CReATE STUDIO Eco Craft Kits for your maker, creator, S.T.E.A.M. fan explorer, tinkerer or builder.
Our kits contain a myriad of recycled and crafty materials for days of creating! $20+tax (and shipping if applicable)
Get yours by calling us at 818-575-9566

Creating at Home Idea 15

Hey kids! Make your own confetti!
This is a fun way to reuse everyday packaging pieces to make a fancy craft embellishment to create with at home.
You can collect the shiny or interestingly printed tear tops from food packaging like coffee, trail mix and chips. I collected the tops from bags that have a zip lock closure (where no food touches).
You can also use wrapping paper or any shiny plastic scraps. Once you’ve gathered a batch of packaging tops or paper, cut them into strips , then stack them on top of one another and cut them into bits between 1/4″ and 1/2″ to make your confetti. Collect your confetti for use with any creating you do at home.

At home…

Creative things happen when you mix paper with imagination.

I found a little snake at the studio made from paper scraps, some markers and glue. This kind of project make a great Creating At Home idea so let’s do it!

What you’ll need to get started:

Scissors

Paper (a few different kids/colors)

Markers, Pens or Pencils

Glue

Next: your your hand at making a snake or whatever noun you choose. That’s it!

Take a picture what you make and tag @createstudio we’d love to see what you come up with!

Map it!

It’s been a while since we shared a “Creating at Home” idea and the time is right for this one!, Creating at Home idea 13 is making a Map Puzzle!
This is something to plan on now and assemble later, after a summer trip.

If you don’t have one yet, get your hands on one and take it with you when you travel. Take along a pen or fine tip to mark special spots you traveled to or silly stick figures to mark your spots throughout your travels. When your home the creating begins!

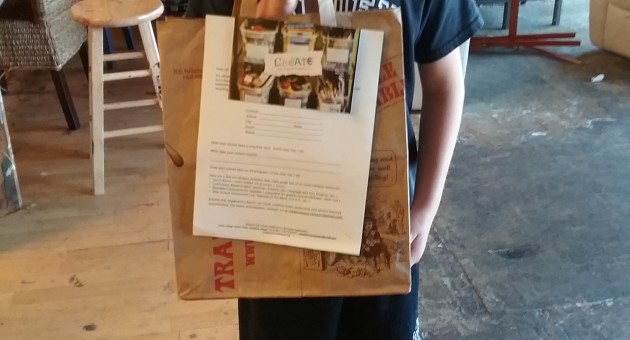
Collect empty cereal, cracker or pizza boxes to become a backing for your puzzle. Cut them into flat pieces.

Take your map an cut it into interesting shapes that will fit together like a puzzle. 

Use a glue stick or white glue and adhere the map to the flat sections of boxes and trim them to the puzzle shapes.

Now you have a personalized puzzle and fun memories of your trip.

To Finish and protect the puzzle you can cover it with clear packing tape (as pictured) or get your hands on some Mod Podge to seal it.

Your done! Enjoy.

Good idea!

​Brody had a great idea to visit CReATE STUDIO for materials for a school project he is doing at home.

We had a great idea to offer him a CReATE ON YOUR CAMPUS Fill-A-Bag that he could use to collect the materials he would need.

We ask for a $10 donation that goes right to our C.O.Y.C program which gets campuses set up with easy reuse systems for their campus materials, establishing endless possibilities for creativity in project based learning or in an open-ended way.

This way he can work at his pace at home. Maybe he spends an afternoon working or, a few snippets of time over the weekend. He took a bit of CReATE with him and has it at his disposal and we like that our bag is ready when his creativity is ready.

What a win!

Creating At Home #12

​Fall brings with it great smells. Try our Creating At Home Idea #12-Making Pomanders – an old fashioned treasure.

This may require a trip to the store but is well worth it. 

Two simple ingredients will get you on your way to a bowl of aromatic goodness…

You will need:

-Oranges (just one or a whole bag!)

-Jar of Whole Cloves

Now for the fun part: Make your clove patterns on the oranges by pressing the pointed end of a whole clove into the skin of a whole orange with the peel still on. you can play around with designs and patterns.

If you make a large batch of Pomanders you can display them in a bowl and enjoy their Sweet smell.

Creating at home #11

​Thankful day 12 is Creating at home idea number 11- make a Thanksgiving pop-up card to send to family near or far.

You’ll need two pieces of paper that you can color or paint, markers, pencils or paint and glue (a glue stick and 8x11size paper works great)
Before creating your design lay the two pieces together and fold them in half, sideways.
Then, take the top of the inside paper and at the fold line, fold it diagnally like a triangle-you choose how big or small this fold will be . It will be the pop-out part of your card.
Then decorate your papers as you would like, one to be the inside of the card and one to be the outside, and glue them together leaving the top pop-out corner free to move facing inward.

Presto, you have a cool card to share!

Creating At Home Idea #11

​Thankful day 2 is one of our yearly repeat ideas, this time as  “Creating At Home Idea Number 11″ make a word banner that inspires grateful thoughts at your house. We like the word Thanks but we also like Bounty and Family as easy ideas. 

You will need  a few sheets of paper or pieces of cardboard ( cereal boxes are great for this) to cut your letters. We made our letters about 6” tall.  Next you can hole punch one or two times per letter to thread string, yarn or ribbon through and voila! You’ve got a banner to don your fireplace or featured wall for an extra Thankful month.

Creating at home idea #10

​We’ve got a quick seasonal project we love- it’s fun too! Here’s Creating At Home Idea # 10 -Batty T.P. Rolls!
Although our example is your basic bat you can make your bat any way you choose based on the materials you find at home.To get started you’ll look for:
-A TP roll
-Pattered or solid paper to cover the roll and cut into wings if you want a colored or pattered bat
or a second TP roll to make into wings.
-Contrasting paper or an item you find at home to turn into fangs-use your imagination and be
silly.
-Googly eyes, buttons or a marker to give you bat night vision.
-lastly you’ll need tape, a stapler or glue to attach you parts together.
-Now it’s time to make!
With what you have chosen for a body you can use or make tube by rolling paper, tape or staple it, then cut a shallow U shape out of the top (we flattened our roll to do this.) Fold the wing piece (you’ll want to be sure whatever material you use it’s doubly wide, fold it over, then cut around the outer edge of your paper (keep the fold) to create your wing shape.
-Attach your wings with (tape or stapler) fastener.
-Add some fangs and eyes then your officially batty!

Creating at home idea # 9

Chalkboard Tabletop.

This easy project requires a trip to the  craft or hardware store to begin, but it’s worth it.

Before you go, scout out a table small table at home, a paint brush and a piece of chalk.Perhaps a side table that needs a bit of jazzing up anyway.

Once you have a table decided your going to go out and get a small container of chalkboard paint (no need for more than a quart). There are a number of brand choices these days depending on whether your in a craft store of a hardware store.

With your table clean and paint in hand your ready to paint. Cover just the table top with the chalk paint. Do two coats, allowing dry time between coats. Once the table is painted the lasting fun begins. Now, the whole family  can use the chalk you found to draw seasonal pictures and messages throughout the year. It’s even fun when displaying hors d’oeuvres for company, just write out your cheese and cracker display on the table.

Enjoy!